


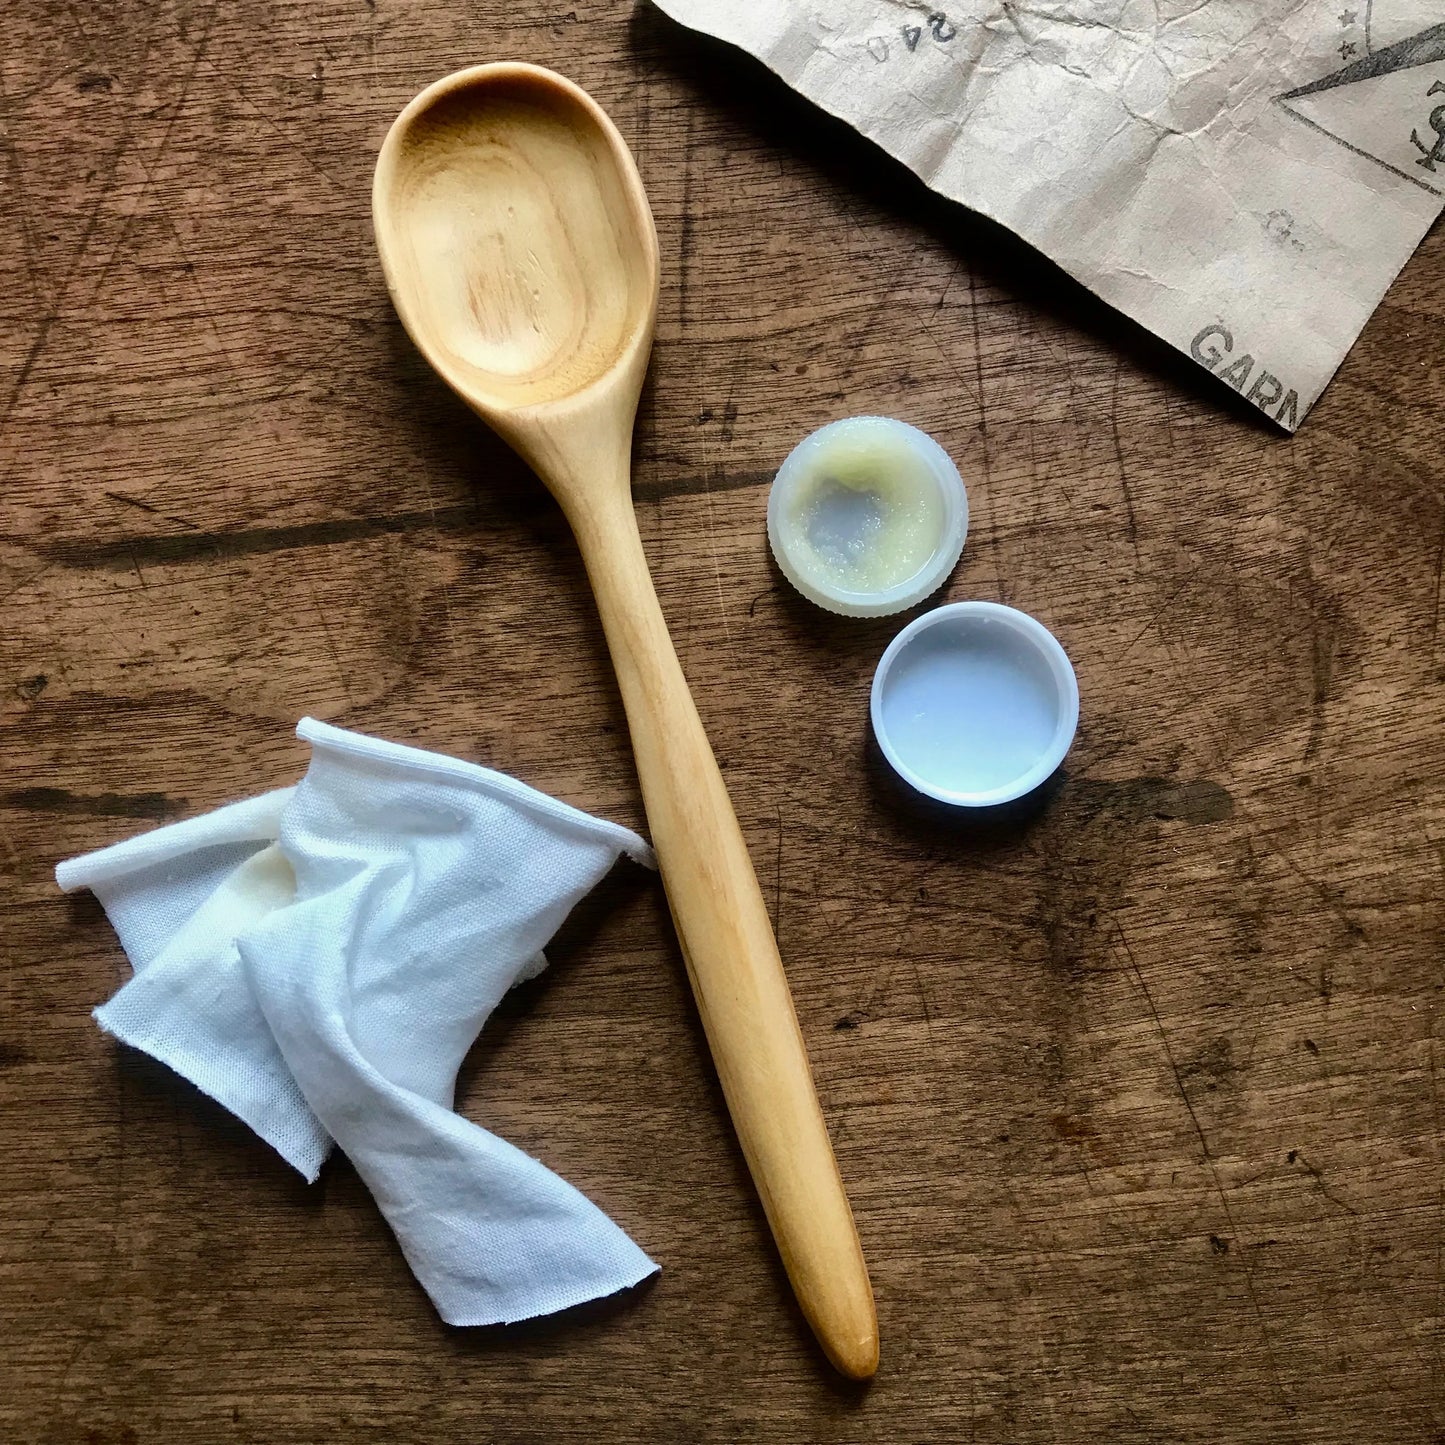
How To Use:
Design your spoon:
Decide on your preferred spoon shape and sketch the outline with a pencil. Carefully carve along the line using a craft knife or cutter. Take care not to injure yourself when using sharp tools.
Shape and smooth:
Once the rough shape is formed, sand the surface with No.150 sandpaper until the edges and spoon tip are smooth.
Refine the finish:
Continue sanding with No.240 and No.400 papers until the surface becomes completely smooth and even.
Apply beeswax:
Use a cloth to apply a thin, even layer of beeswax over the entire spoon, ensuring it’s lightly coated.
Final finish:
Wipe off any excess wax with a clean cloth, then leave the spoon to dry for 24 to 36 hours. Once dry, your handmade spoon is ready to use.
Care & Safety Instructions
- Take care when carving to avoid injury
- Wear protective gloves where possible
- Keep hands clear of the blade's cutting path
- If the surface becomes worn, lightly sand and refinish with natural oil (e.g. vegetable oil)
- Regular maintenance will help your spoon last for years to come